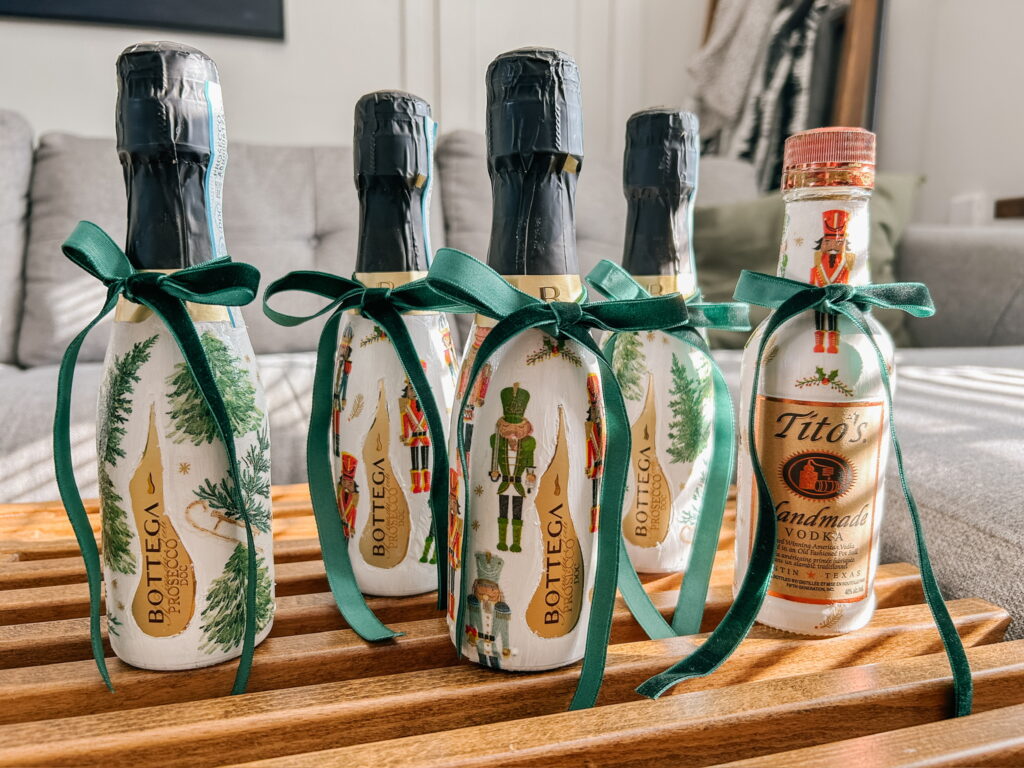
When my friend announced she was hosting a girls’ Christmas get together, I knew I couldn’t resist adding a special small DIY gift for all my besties. And who doesn’t love a personal-sized bottle of Prosecco all dressed up?!
If you’re looking to elevate a bottle of wine or liquor into a one-of-a-kind gift, here’s my step-by-step (with a few lessons learned) to help you make a Pinterest-worthy creation! Spoiler: It’s a little trickier than it looks!
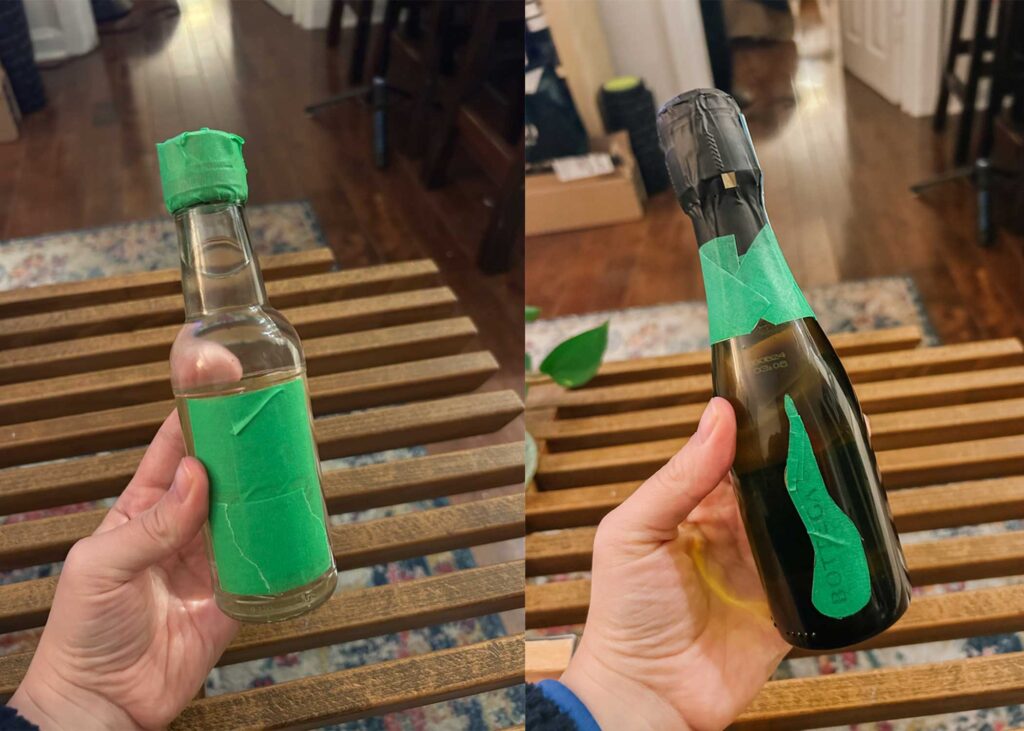
Step 1: Tape is Your Friend (Even if Your Bottle Isn’t)
Start by covering up all those labels and caps with painter’s tape. This step is crucial, especially if your bottle’s label is anything other than square. I’m a bit of a Prosecco snob who cares about the flavour and naturally it was the one bottle that had a wonky label shape. It was trickier to tape off than I thought.
Lesson learned: go with a bottle that has a nice square label for your first time.
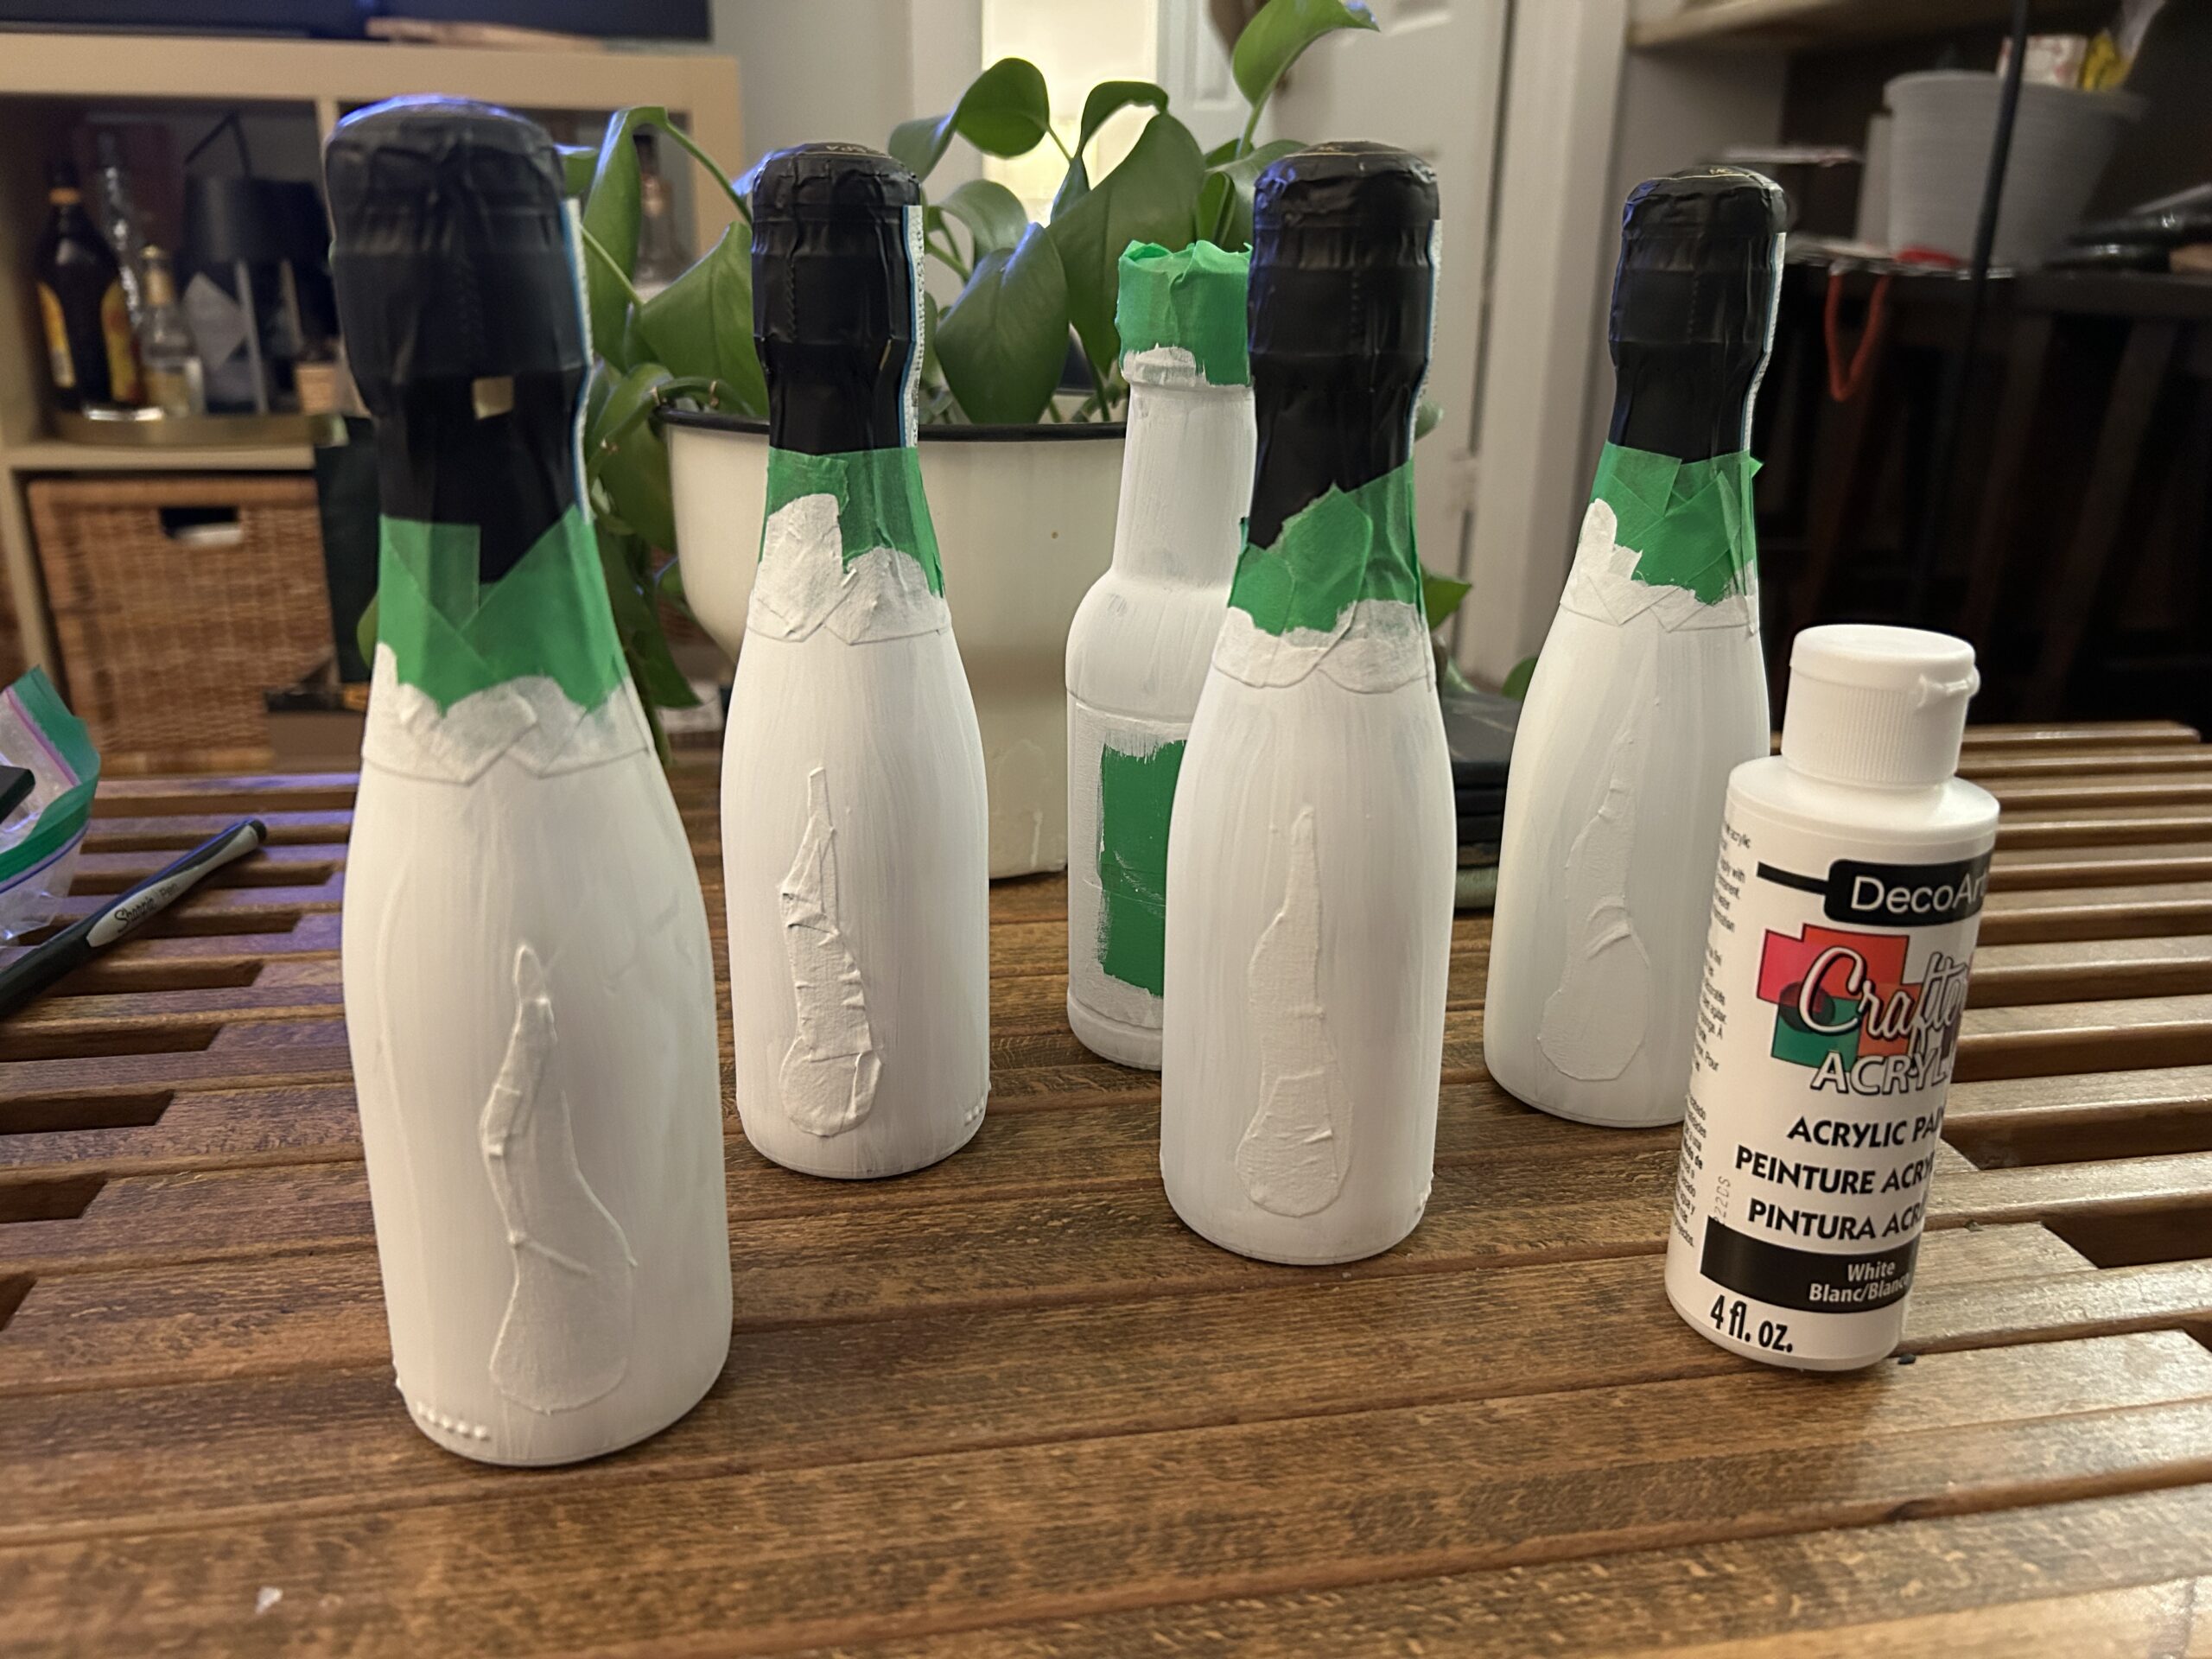
Step 2: Paint the Bottle (Patience is a Virtue, Trust Me)
Now for the fun part—or so I thought! I used white acrylic paint from the dollar store, expecting it to glide on. Surprise! It didn’t stick well at all. Next time, I’ll try wiping the bottle down first to remove any oils. Expect to do at least 3-4 coats, and let each coat dry completely before adding the next one. Trust me, I was way too eager, and my second coat started pulling up the first. More time consuming but worth it for that smooth, classy finish! Especially since you do see the white paint through the napkins.
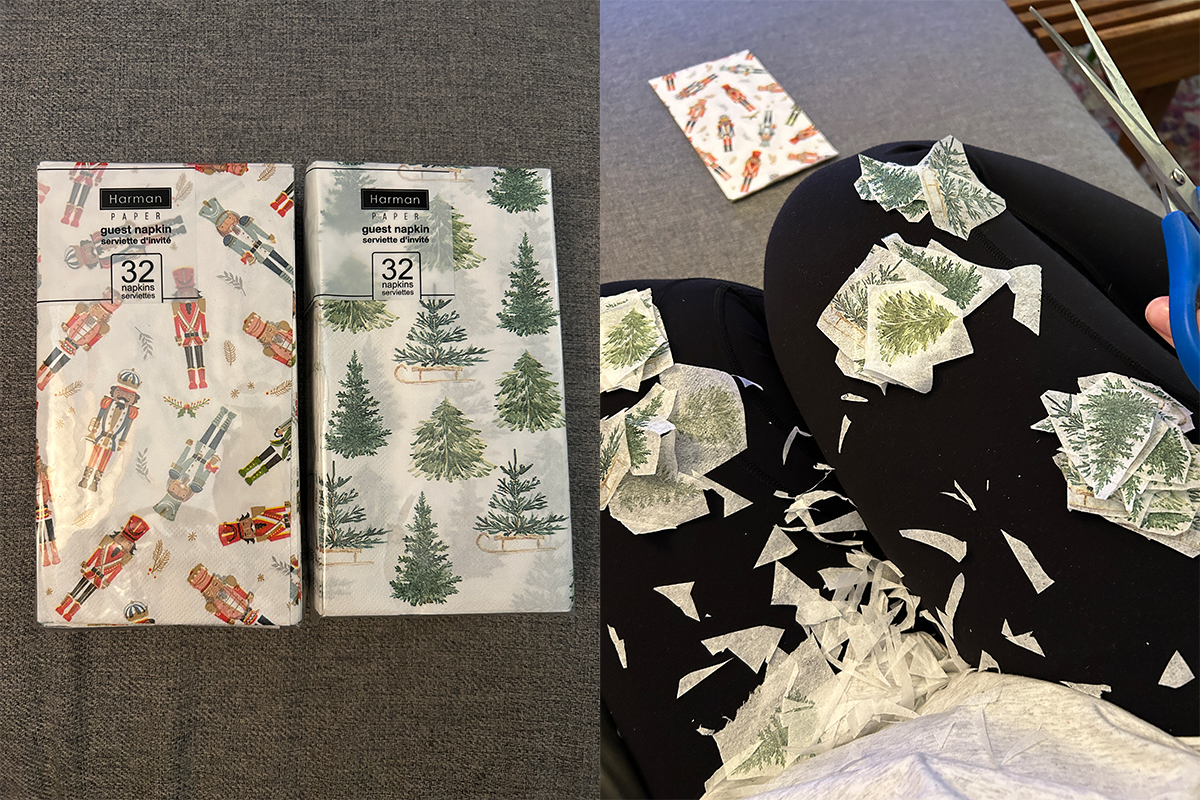
Step 3: Prep Your Napkin Designs (a.k.a. DIY TV Time)
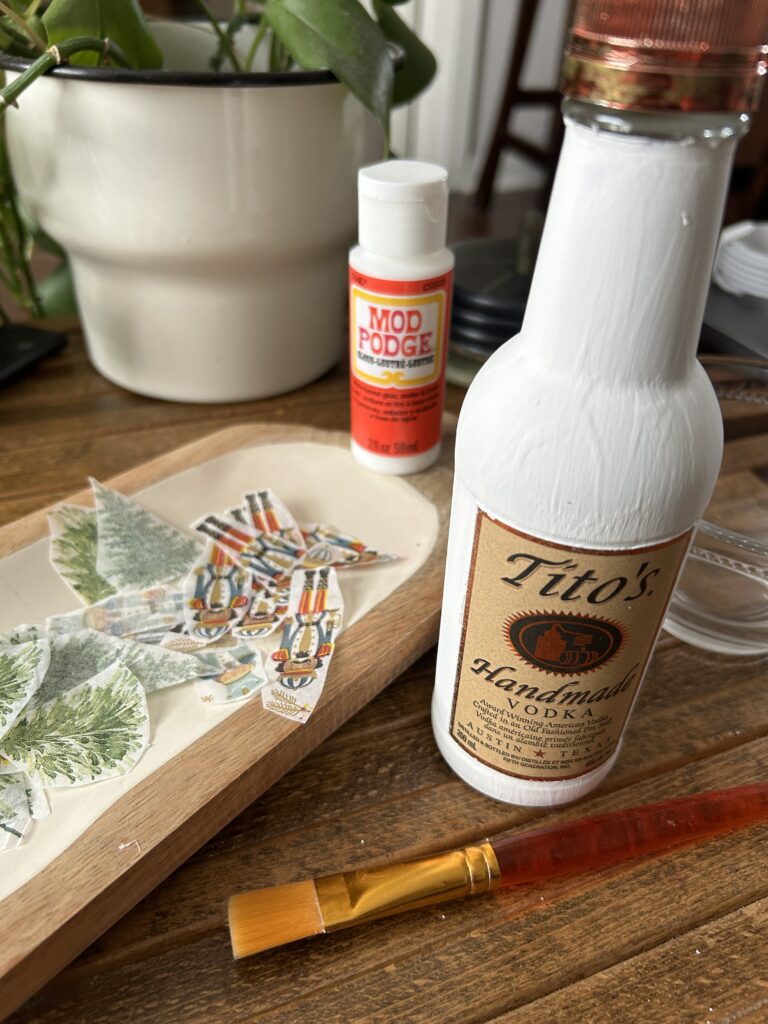
While your paint is drying, it’s time to cut out designs from your decorative napkins. Go as detailed or simple as you want, but here’s a pro tip: napkins come in layers, and you only need one! Peel back those layers until you have a single sheet—it’ll stick better and look cleaner.
I prepped mine while watching TV, and yes, I was left with a confetti-style mess on my floor.
Step 4: Tape Troubles (Leave It or Remove It? Decisions, Decisions)
Here’s where things get interesting. You can either leave the tape on while you Mod Podge or carefully remove it before. Leaving the tape on is fine, but you might end up needing an X-Acto knife to cut clean edges afterward. I found removing the tape before Mod Podging worked better on bottles with more straightforward shapes (hello, Tito’s).
Step 5: Applying the Design (Go Easy, Tiger!)
Once your paint is dry, grab that Mod Podge and a brush. Apply a thin layer of Mod Podge on the bottle, gently press on your napkin piece, and smooth it out carefully. Then, add another thin layer of Mod Podge over it to keep it sealed and wrinkle-free.
Gentle is the keyword here! This stuff is delicate, so avoid touching any wet parts or they might rip.
Step 6: Final Sealing & The Big Reveal!
After about 30 minutes (or more, if you’re patient), give the entire bottle another layer of Mod Podge to seal it all in. I went with a gloss finish for that extra sparkle, but matte works beautifully too. Let it dry, and if you left any tape on, now’s the time to carefully peel it off for that perfect edge.
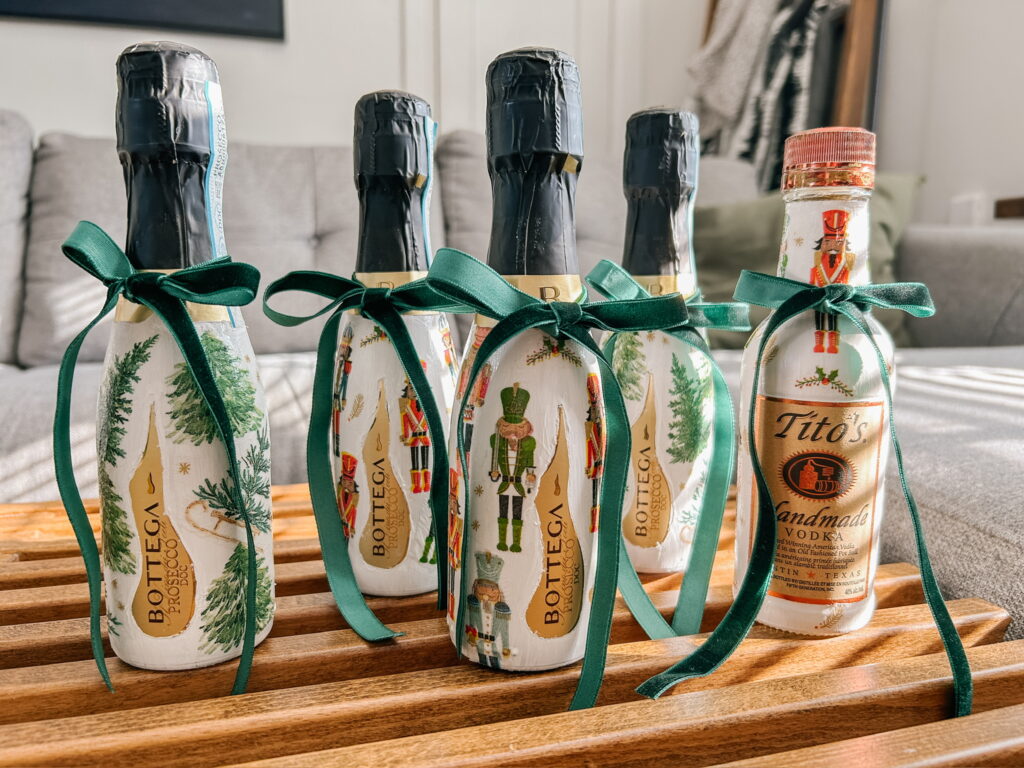
Add a little ribbon or bow to finish it off, and you’ve got yourself a personalized mini bottle!
Cheers!!

